
Image copyright belongs to Campark.
The Campark 4k Wifi Ultra HD Waterproof Sports Action Camera was kindly provided to me by TODEAL free of charge in exchange for a fair and unbiased review on Amazon.co.uk and Amazon.com. No additional compensation was given in exchange for posting this article on my blog.
The Campark 4k Wifi Ultra HD Waterproof Sports Action Camera is available in the UK from TODEAL Fulfilled by Amazon at a cost of £52.99 with free P&P. In the US the Campark 4K Action Camera is available from Jeemak US Fulfilled by Amazon.com at a cost of $69.99 with free P&P (Prices correct at time of posting).
To enlarge an image and view its description, please click on the image.
PACKAGING & CONTENTS.
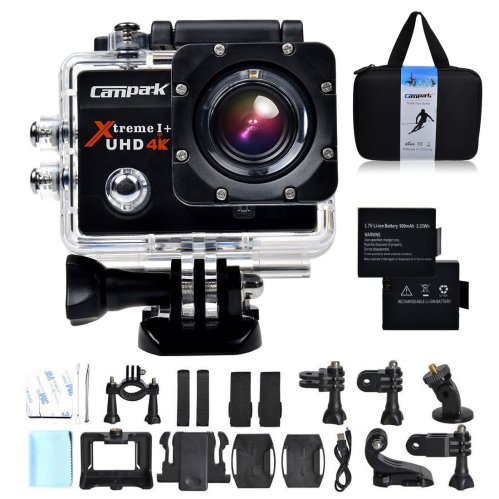
The Campark 4k WiFi Ultra HD waterproof sports action camera is supplied within a black EVA carry case with a white card sleeve wrapped around it bearing some branding information. Inside the case you will find the camera, a large assortment of accessories and a manual as detailed below…

ACCESSORIES.
Each of the following are found inside the case and are individually wrapped in clear resealable plastic bags. (The descriptions are as noted within the instruction manual).
Waterproof case: This comes supplied with the camera installed and I will cover this more in depth later on.


Bicycle bracket (bike handlebar mount): This is a black plastic mount that has a gap in the centre, two quick release bolts on the edges and a universal female GoPro style mount located on the top edge orientated left to right.

The gap for the handlebars can be set between 16mm and 22mm, and the jaws that clamp onto your handlebars are padded with a very loose fitting piece of silicone padding (this silicone padding isn’t actually attached to the mount so take not to lose it when removing the mount from your bike). For those that find the 22mm maximum adjustment is insufficient longer bolts are easily sourced to expand the mount further.

When the adaptor is mounted to your handlebars you will note that the GoPro mount on the top of the adaptor faces sideways (left to right) and not forwards. Rather than directly mounting your camera to the bike adapter you will need to first attach switch support 2 or 3 which will then change the mount orientation to facing forwards (or backwards).

It should be noted that this mount is also suitable for pretty much anything that is round measuring between 16mm and 22mm in diameter such as walking sticks, ski poles, wheelchairs, mobility scooters and of course other frame parts on your bike.
Pedestal (base) 1: This comes already attached to the waterproof case and it is a flush fitting clip attachment with a female universal GoPro mount located towards the front of the clip. Both Pedestal 1 & 2 can be used in conjunction with the “helmet base” mounts as well as numerous other compatible accessories (that are not included).

Pedestal (base) 2: This is similar to Pedestal 1 but the female GoPro fitting is on the rear of the clip rather than at the front and the mount is also slightly raised, allowing for a greater degree of articulation of the camera (on the vertical plane).

Curiously, in the manual both Pedestal 1 and Pedestal 2 are both illustrated as having quick release bolts, in truth, however, only Pedestal 1 comes supplied with such a bolt and there is no second bolt included in the packet with Pedestal 2.
Back Clip: This description is actually a little misleading, this accessory includes two parts. The first is a small black plastic case/surround that holds the bare camera (without the waterproof case). At the top and bottom of the case there are 1/4″ brass mounting threads and on the rear is the retainer for the second part of the “clip” which is actually… a spring clip.
The clip without the …er clip attached on the rear can be used in conjunction with other accessories (that are not included) such as a tripod or car mount allowing the camera to be used as a dash cam. When the clip attached to the… clip it allows you to mount the camera on a belt, open edge pocket or indeed anything else up to 9mm thick.


Fixed base & Communicator (they mean adaptor): The underside of the Fixed Base is round and flat with a 1/4″ brass thread and on the top there is a female universal GoPro mount (without a quick release bolt). This can be used as a basic tripod mount or with the aid of some of the double sided sticky pads as a very basic dash mount.

The Adaptor also has a round, flat base, but this time with a protruding 1/4″ thread and at the top there is a male universal GoPro mount. Also attached to the thread on the underside is a plastic locking dial that is used to provide a secure, flush fit to whatever the adaptor is attached to (screw the adaptor on clockwise and then turn the locking dial anticlockwise to tighten both components together, similar to how a flash is mounted to a DSLR).
The Fixed Base and Adaptor can also be used in conjunction with each other to provide an adaptor that orientates the camera in any direction you wish. Simply screw the Adaptor on to the Fixed Base until the thread is fully secure, then loosen the Adaptor so that the camera is facing the desired direction, then hold the adaptor in place and turn the locking dial anticlockwise to secure the Fixed Base and Adaptor together whilst retaining the desired angle.
Switch support 1: This is a short straight (does not change the orientation of the camera when used) male to female universal go pro adapter with a quick release bolt on the female mount. There’s no point in measuring this as its the shortest possible adaptor that can be made with no extension.


This can be used to make the camera stand slightly proud and offer an improved degree of articulation and it can be used with other components to make a right angle mount as well.
Switch support 2: This is the same as “Switch support 1” except that the male and female connection face opposite directions (a right angle adapter). Again, this has no additional length and is just an adaptor without extension, useful for altering the facing of the camera.


Switch support 3: This is the same as “Switch support 2” except that it is longer offering a slight extension as well measuring 50mm long in comparison to the 35mm overall length of support 2.


Helmet Pedestal (base): There are two helmet mounts provided that are very near identical with the sole exception that one has a 1/4″ brass tripod mount in the centre and the other does not. Both have strap mounting points on the edges, use clip attachments such as Base 1 or Base 2 to attach the camera and both have pre attached unbranded double sided sticky pads on the underside.
To attach these mounts to your helmet ensure to use both the provided straps, sticky pads and also the use of a steel wire (provided) is also highly advised.
Bandage: The accessories listed within the manual as the “Bandage” are in fact 4 canvas straps. The first two straps are 21.4cm long, 1.15cm wide lengths of canvas with a 15.5cm long patch of “hook” Velcro on one end and a 5.2cm long patch of “loop” Velcro on the reverse at the opposite end.

The other two straps measure 36cm long and 2.5cm wide and are made from plain nylon canvas. On one end of each of these straps is a plastic overlock buckle and the other end is plain and without feature. These straps can be used individually or secured together to for a greater length.


The straps can be used in conjunction with the helmet base mounts to secure the camera to pretty much anything that you can find that will fit.

Ribbon: These are actually four 19.8cm long 3mm wide, non reusable nylon cable ties.

Mat: These are actually unbranded double sided sticky pads that are spares for the helmet mounts.

Wire cable: This is a 16cm long, 1mm diameter high tensile steel wire with a 15mm x 4.5mm long loop on each end. This is intended to be used in conjunction with the helmet mount as an additional layer of security for your camera.

Data cable: This is a USB A to 5 pin micro B cable used for data transfer and charging the battery when installed in the camera and it also enables the camera to be used as a webcam as well.

Charger: The manual clearly shows in the contents list an EU mains charger, it should however be noted that the Amazon listing clearly states that no charger is included and … there isn’t.
Manual: The manual is an 11 page colour illustrated manual entirely in English with rather limited information on offer regarding camera settings and some illustrations regarding use of some of the accessories.


Cleaning cloth: This is a fairly run of the mill 13.5cm x 13.5cm glasses cleaning cloth with a serrated edge.

Shell: This is a replacement back panel for the waterproof case complete with silicone seal.

Also included in the package, but not noted within the manual is a second battery (one is in the camera and the second is located in the carry case) and an EVA carry case. The case is semi rigid with a mesh full width pocket inside the lid and a pre cut foam insert in the base for the camera, spare battery, two clips, one pedestal (base) and one large compartment taking up one entire side of the case.

Overall the quality of the bundled accessories is similar in quality to the 10, 20, 50 in 1 GoPro accessory kits sold by any number of sellers on the web. Some of the quick release bolts don’t quite tighten up as well as they should and some of the male / female universal GoPro mounting sections are a little oversized or incorrectly spaced. They all work, but some are stiffer or looser than others.
SPECIFICATIONS.
LCD DISPLAY: 2″ LTPS (Low Temperature PolySilicone) LCD.

CHIPSET: Allwinner V3.
LENS: 170 degree A+ HD wide-angle lens. (Additional information unavailable).
IMAGE SENSOR: While there is no mention of this within the manual the Amazon product listing claims it to be a Sony IMX179, it is however my belief that this is incorrect. My logic for this is that after considerable research I have come to the conclusion that this camera is a Q3H or Q3H-1 which uses an OV4889 4MP sensor.

The Q3H+ and Q5H series use the Sony IMX179 sensor but this is most defiantly not one of those cameras. If anyone has proof to the contrary, please let me know and I will amend this claim.
LANGUAGE OPTIONS: English, German, French, Spanish, Italian, Portuguese, Traditional Chinese, Chinese Simplified, Korean, Japanese & Russian.
VIDEO RESOLUTION: 4K @ 30FPS, 2.7K @30FPS, 1080p @ 60FPS or 30FPS and 720p @ 120FPS or 90FPS.
VIDEO FORMAT: The manual states MP4 yet the Amazon listing claims MOV, the former is correct and there are no options to change it.
VIDEO MODES: “Time-lapse” this essentially takes a still image at preset intervals (0.5, 1, 2, 5, 10, 30 or 60 seconds) and forms the images into a video as prolifically used in wildlife / nature documentaries.
“Loop Recording” this mode records in segments for the length of time selected (2, 3 or 5 minutes). The final mode is “Slow Motion” with options of 1080p @ 60FPS or 720p @ 90FPS, exact details are lacking, but this appears to slow the footage down by about 50%.
COMPRESSION FORMAT: H.264.
PHOTO RESOLUTION: 16M, 12MP, 8M, 5MP or 2MP.
STORAGE: Both the manual and the product listing, simply state the camera supports a MicroSD up to 64GB. Thus far I have only had the opportunity to test the camera with 32GB cards and while I am unable to comment about 64GB cards I can say that a Sandisk Ultra is ample to record footage at any of the available resolutions.
PHOTO MODES: Single shot, “Drama Shot” (burst mode) with options of either 3, 5 or 10 pictures, “Timed” this is a time delay single shot with options of 3, 5, 10 or 20 seconds. The final mode is called “Auto” which is a continuous time delay shot with options of 3, 10, 15, 20 or 30 seconds (E.G when set to 3 seconds when the shutter button is pressed a picture will be taken every 3 seconds until the shutter button is pressed once more).
FREQUENCY: Automatic / 50Hz / 60Hz.
POWER SOURCE: USB, 5v, 1A.
BATTERY: 900mAh 3.33Wh 3.7v user replaceable Li-ion battery.
RECORDING TIME @ 1080p: The manual states “About 90 minutes”. When recording 1080p @ 60FPS I was able to record just over 110 minutes of continuous footage (in a low noise area) before the camera shut down.
CHARGING TIME: The manual states “About 2 hours”, which is “about” right.
OPERATIONAL LIMITS: The manual claims the device has operating thermal limits of -10c to +55c or storage limits of -20c to +70c. Sadly they is no mention in the manual of water resistance specs although the Amazon listing claims resistance to a depth of 30m (which is identical to all the other action cameras I have previously reviewed).
BATTERY / CHARGERS & CHARGING.
The battery within the camera is a 3.7v Li-ion 900mAh 3.33Wh battery bearing no make or model number. The dimensions of the battery are 29.26mm wide, 32.94mm long and 10.83mm deep. Doing a little research they appear to be the same batteries used in the SJ4000/SJ5000 sports cameras and are readily available for around £5 to £6 each.
To test how much footage the camera can record in one session the battery was fully charged and then the camera was set to record using the following settings…
Resolution: 1080p @ 60FPS, Exposure: 0/0, White Balance: Auto, WiFi: Off, Image Rotation: Off, Driving Mode: Off, Light Source Frequency: Auto, LED Indicator Light: On, White LED (flash/video light): Off, Auto Screen Saver: 30s, Auto Shutdown: Off, Time Watermark: On, . (These are basically the factory default settings).
Eventually, when the camera ran out of juice and switched itself off it had recorded 1 hour, 50 minutes and 3 seconds of video. Curiously, even though the camera had stopped recording and shut down indicating a flat battery, I was able to switch the camera back on again and start recording again for about 2 minutes before the camera again shut down. It was then powered back up again and it even managed to record yet another 2 minutes of footage.
Even now as I try to kill the battery to run some timed charge and capacity tests I am struggling to completely drain the battery. I have so far managed to switch the camera back on at least another 30 times with the camera booting past the splash screen and then shutting down after about 2 seconds.
This scenario appears to be a common trait of either the camera or more likely the batteries as every action camera that I have reviewed in the last 2 years has done the same.
Charge testing
The following charge testing was conducted using a laptop USB 2.0 port with readings taken from a Drok USB multimeter.
– Initial readings were 4.90v, 2.597w, 0.53A
– After 22 minutes the readings were 4.89v, 2.787w, 0.56A and 209mAh had been charged.
– After 44 minutes the readings were 4.89w, 2.737w, 0.57A and 410mAh had been charged.
– After 1 hour and 45 minutes the battery had been charged by 785mAh and was now showing as fully charged.
Now there are some points to be made. Firstly the battery wasn’t truly dead before the charge test was started. Before doing a charge test the camera was fully charged and set to record and then left alone until the battery died and as noted earlier, the battery simply wouldn’t give up.
As you will see from the test I only managed to charge the battery by 785mAh, 125mAh less than the claimed size of the battery, despite this it still managed to record 20 minutes more footage than claimed and it also took 15 minutes less than stated to fully charge.
CASE & WATERPROOF TESTING.
The first thing I did (and the first thing you should do before using the camera underwater and each subsequent time before you intend to use it under water) was to test the seal. To do this I removed the camera from the case stuffed it with tissues and weighed into down in a bucket of water (otherwise it floated) for about 15 minutes.

The seal on the case won’t last forever and it will eventually it will need to be replaced, especially if used regularly in strong direct sunlight. So by testing it before each time you plan to use it underwater you will improve the chances of finding fault before it has a chance to damage your camera. (This sort of stuff should be in the manual, but sadly it isn’t).

I am glad to say with this somewhat limited test (the only thing I can do short of a 60 mile round trip to the sea as I suspect trying to sneak the camera along to my local pool would result in porridge for breakfast) all was good and the paper towels were dry upon being removed.
The locking mechanism on the case for those that are unfamiliar will prove frustrating at first and I will confess to taking a moment to figure it would myself the first time I used one. Look at the top of the case and there is a small switch that has to be pulled with your fingernail to the right. While holding this to the right, you then have to lift the front edge of the flap up. This can be quite tricky to do standing up and is much easier sat down where you can push the case into your lap.
The buttons on the case are metal sprung loaded plungers that activate the buttons on the camera within the case when then are pushed and I am glad to report that all of the buttons on both the camera and case operate as intended without issue. Overall the quality of the case is good, although you will want to keep that glasses cleaning cloth handy as it is a bit of a fingerprint magnet.
THE CAMERA.
The front of the camera is plastic with a soft, smooth finish, thankfully, unlike some other action cameras I have previously reviewed it does appear to be matte black plastic rather than white plastic sporting a vinyl transfer.
All four edges of the camera, however, are made from what appears to be ABS black plastic with a slightly glossy finish sporting a check / diamond pattern that should prove very durable and offer a reasonable grip when in use out of the waterproof case. As for the rear the camera well that is entirely covered by a thin piece of clear plastic with a black border around the display.
On the front to the right, you will find a 15mm diameter wide angle lens, with an LED light just below and to the right a 10mm diameter power / mode button (information on the controls follows shortly). On the top to the right is a 10mm diameter “OK” shutter button with a small LED indicator light just to the left, which lights up red when WiFi is enabled on the camera.

On the left side of the camera you will find an exposed MicroSD card slot, USB Micro B sync & charge port a mini HDMI out port and the microphone (which is pretty impressive as long as the camera isn’t in the waterproof case). On the right side you will find narrow up and down buttons and an equally small mono speaker (which is very, very quiet).

On the underside the only feature is the battery compartment cover that sadly unlike every other action camera that I have reviewed does not have a switch mechanism to release the cover. With this particular sample to remove the cover a fingernail of some length is required to pry the cover open, which is annoying for those of us who do not.

On the back of the camera you will find the 2″ colour LCD display located centrally and slightly offset to the left. This has a black glossy surround that covers the remainder of the rear of the camera and as previously noted, this has a clear plastic cover finishing it off along with another two indicator LEDs in the bottom left corner (recording and charging indicators).

CONTROLS.
Power button: Hold this down for about 2 seconds to turn the camera on or off. When the camera is on tapping this button (careful not to hold it down) cycles through the available modes.
When first switched on the camera is by default in standard video recording mode. Tapping the power button once takes you to the picture (photograph) taking mode, a second tap takes you to slow motion recording mode. A third tap takes you to the image / video browser and one final tap takes you to the settings menu.
OK button: In video recorder mode, tapping the OK button starts recording video and tapping it once more stops recording. In picture taking mode, pressing the OK button takes a picture. In the image, video browser mode, pressing the OK button will play any selected pre recorded file, when viewing pictures, however it does nothing and In the settings menu the OK button is used to select and confirm.

Up and Down buttons: When in video or picture taking modes these buttons zoom in and out (the camera has 4x digital zoom and no optical zoom). It should be noted that these buttons are rather clicky and when the buttons are used while recording video the camera acts like a drum amplifying the noise made quite significantly. When in the settings menu they are used for navigation and when WiFi is active on the camera holding down the up button disables WiFi.

SETTINGS MENU.
RESOLUTION: 4K @30FPS, 2.7K @ 30FPS, 1080p @ 60FPS or 30FPS, 720p @ 90FPS, 60FPS or 30FPS.
If you just want the highest quality video and are not using the camera for fast paced action then use 4K @ 30FPS. If you are however using the camera for something sporty I would opt for using 1080p @ 60FPS as this will reduce any motion blur produced from filming such activities. There is no need to use 720p as the battery will die long before even a 16GB card is filled when recording at 1080p.
RECORDING SOUND: On or Off.
This simply enables or disables the on board microphone.

TIME-LAPSE: Close (off), 0.5s, 1s, 2s, 5s, 10s, 30s or 60s
When using the primary recording function if this is set to “close” (off) you get a normal continuous recording. If set to any other duration instead of a continuous recording the camera essentially takes a still at the selected interval and compiles the images into a time-lapse recording.
LOOP RECORDING: Close (off), 2 minutes, 3 minutes, 5 minutes.
This is similar to the loop recording on dash cams. What it does is record constantly, but in 2, 3 or 5 minute segments (with no gap between each file) reducing the need for memory card maintenance. This is especially useful for those using the camera as a dash or bike cam for the their daily commute.
SLOW MOTION: 1080p @ 60FPS or 720p @ 90FPS.
This setting affects the secondary slow motion recording mode only. Footage shot in slow motion 1080p @ 60FPS is recorded at 60 frames a second but slowed by 50% and output at 30FPS.
PHOTO RESOLUTION: 16MP, 12MP, 8MP, 5MP, 2MP.
This sets the quality of pictures taken.

TIMED: Close (off), 3s, 5s, 10s, 20s.
When set to off the shutter button takes a single image as soon as the shutter button is pressed. If set to any of the available durations when the shutter button is pressed a countdown for the selected time begins before taking a single picture.
AUTO: Close (off), 3s, 10s, 15s, 20s, 30s.
This is similar to the “TIMED” function, however rather than just taking one picture the timer recycles and the camera continues to take a picture every 3, 5, 10, 15, 20 or 30 seconds until the shutter button is pressed a second time to cancel the timer.
DRAMA SHOT: Close (off), 3P/S, 5P/S, 10P/S.
This sets how many pictures are taken when the shutter button is pressed in picture taking mode. (P/S means pictures per second).
EXPOSURE: -3, -2, -1, 0 (default), +1, +2, +3.
This is exposure compensation. If the images you are taking are too dark gradually increase the exposure till you find the perfect balance and if they are overexposed (too bright) then gradually reduce it.

WHITE BALANCE: Auto (default), Sunny, Cloudy, Incandescent Light, Fluorescent Light.
Auto does an admirable job for those using the camera as a workhorse in a car or on a bike. If however you are trying to produce a high quality video it is worth making the effort to use the correct setting for your given situation.
WIFI: On or Off.
Has to be manually enabled in the settings when you want to wirelessly transfer data to or from the camera with a laptop/desktop or when you want to control the camera using a smartphone (something I will cover shortly).
IMAGE ROTATION: On or Off.
This setting flips the screen (and lens) upside-down. Sometimes the only way to suitably mount the camera (due to the universal mount being at the bottom of the waterproof case) is to do so upside-down. When you have to do this you can flip the camera orientation in the settings so that it records the correct way and it also flips the screen display for you as well.
DRIVING MODE: On or Off.
When I first posted this review I stated that I was unaware of the function of this setting. I did, however discover the purpose with other cameras that I have since reviewed. When enabled the camera automatically begins recording when power is supplied to the camera (such as when connected to a 12v cigarette lighter port) and it automatically stops recording when the power is switched off.
One slight problem with this at least with my previous and current car (a Nissan Qashqai and Ford Focus) is that even when the engine is switched off power is still provided to the 12v port from the battery. As such, if the camera is used in this manner you will likely need to plug the camera in and disconnect it each time, given that the camera is best packed away in the glove box when not in use this is perhaps a good thing. (Credit to Patrick Dent for the heads up on this function of the camera).
LIGHT SOURCE FREQUENCY: Auto (default), 50Hz, 60Hz.
If you find that lights flicker in your video try adjusting the frequency, in fairness the Auto setting does an excellent job.

LED INDICATOR LIGHT: On or Off.
This simply turns all of the indicator LED’s on the camera on or off (charge, WiFi and recording lights).
WHITE LED: On, Off, SOS.
This relates to the LED on the front of the camera located below the lens. Sadly, this does not act as a flash, it is either off, constantly on or flashes an SOS morse code message when set to SOS.

AUTO SCREENSAVER: Close (off), 10s, 20s, 30s (default).
This sets how long the display on the rear of the camera remain active when no buttons are being pressed (pressing any button when the screen is asleep wakes it back up). Unless its an issue set this to 10s as the display is by far the largest drain on the battery.
AUTO SHUTDOWN: Close (off), 1 minute, 3 minutes, 5 minutes.
This is a standby by shutdown timer. If set to 3 minutes, the camera will turn itself off after 3 minutes if there has been no button presses or pictures taken. It will not, however shutdown if the camera is currently recording, it will only turn off if nothing happens for 3 consecutive minutes.
TIME WATERMARK: On or Off.
LANGUAGE: English (default), German, French, Spanish, Italian, Portuguese, Traditional Chinese, Chinese Simplified, Korean, Japanese & Russian.

DATE-TIME: Allows manual setting of the date and time.
FORMAT: Wipes the installed MicroSD card, requiring double confirmation.
RESET TO FACTORY SETTINGS: Restores all settings to factory default.
FIRMWARE VERSION: This displays camera model (blank), Firmware version (C20160716V03), Date updated (20160716) and Manufacturer (also blank).
Sadly, there are some notable omissions within the settings that I have encountered with similar other cameras. Among those missing are face/smile/motion detection/recognition, HDR, ISO, image sharpness and quality, anti shake and colour options (the camera only films in colour, other cameras I have tested have has settings for Sepia and B&W).
WIFI.
There are two uses for the WiFi feature of the camera. The first allows you to connect the camera with a laptop or desktop PC to enable wireless data transfer. With WiFi enabled on the camera the SSID and password for the camera are displayed on screen. Simply open up the network panel on your laptop or desktop and look for the cameras SSID and connect using the password shown on screen.

The second function allows the camera to be controlled using your smartphone (similar to the way the HP LC200W camera functions). This requires you to download an App called “XDV” by Wisdomplus (available on iOS and Android), it should be noted that this App is a generic catch all program not specific to this camera.


Once the App is installed enable WiFi on the camera and then load the App, locate the camera on the list of detected networks and enter the password shown on the display of the camera. After a short wait your phone will be connected to the camera and your phone will have full control over the camera.


Everything is available from taking stills and video to changing any of the settings and even browsing the pictures and video stored on the memory card in the camera. Considering the App isn’t specific to the camera and despite the less than favourable reviews to me at least it appears to do everything you could ask for without fault.


IN USE.
1. The camera can be used to take stills or video while it is in charge. You can even couple it to a power bank and the camera will keep recording until a 64GB MicroSD card is filled. (The battery does get very warm after 2 or 3 hours of constant use and this isn’t something I would advise doing often).
2. The lack of HDR and ISO settings on this camera, sadly means that in low light the image quality is poor and quite grainy (see my earlier time-lapse video for an example).
The onboard LED light can help with close-ups such as if sitting at a table doing a review / unboxing video but stood in the corner of a 3m x 3m x 2.4m room that is very poorly lit is makes absolutely no difference what so ever either with pictures or video.
3. Even in a well lit room image quality isn’t very good (either picture or video), the reason for this is the camera only has a 4MP sensor that uses interpolation to obtain a higher resolution output. As such the two previous action cameras that I have reviewed (the Lynec AC65 and Icefox 12MP 1080p sports action cameras) despite both having a maximum resolution of 1080p @ 30FPS produced a better image.
4. When using the camera to take stills be aware it doesn’t have a flash so you will either need some steady hands, a tripod or a table unless you are outdoors on a bright clear day or the indoors with very bright lighting.
5. The camera only offers a 4x optical zoom, the use of which has a very adverse effect on image quality even when the camera is tripod mounted for stability.
6. Images taken at 16MP take up between 2.7MB and 3.1MB. The size of 1080p video files @ 60FPS average about 230MB per minute.
7. Data transfer from the camera to a PC is painfully slow using a SanDisk Ultra card (about 9MB/s). Use an SD or USB adaptor its 2.5x to 3x faster.
8. The microphone on the camera is pretty impressive with a notable lack of hiss during playback, inside the waterproof case, however the only sounds it records are knock and bumps to the case such as rain dripping on it and the zoom buttons being pressed.
9. While not really an issue, but the 2″ display has some minor banding, on a DSLR or hand held camcorder this could obviously prose a problem, here however its just a sign of poor quality rather than a problem.
Thank you for taking the time to read this review, I hope it has been helpful to you. If you have any questions or comments regarding this review, please post a comment below and I will do my best to answer them.
Copyright © 2014-2016 EunoiaReviews. All rights reserved. Reproduction of any part of this site including images and video files is strictly forbidden without prior written consent.

Bonjour, j’ai un probleme je viens d’acquérir cet appareil mais depuis que j’ai appuyer plus de 5 secondes sur power l’ecran reste fixe et plus rien ne se passe.
Merci de votre aide
Cordialement
LikeLike
Greetings Stephane, my French is not so good, sorry. Are you saying that the screen switches off after 5 seconds or that the entire camera switches off after 5 seconds ?. If it is the screen this is likely the “Auto Screensaver” setting in the menu. If the entire camera is shutting down after 5 seconds and you are sure the battery is charging properly (the charging indicator lights up red when on charge) I would return the camera for a replacement as there is possibly a fault with the camera or battery. I state this as the power saving feature of the camera has a minimum setting of 1 minute and not 5 seconds.
I hope this helps
Kind regards
Eunoia
LikeLike
how i remove battery ?
LikeLike
First remove the camera from the waterproof case, then look on the underside of the camera and you will see the battery compartment cover that can be opened using a finger nail. The compartment is not sprung loaded and to remove the battery you have to pull a small plastic tab to remove it.
https://eunoiareviews.files.wordpress.com/2016/08/campark-4k-wifi-ultra-hd-waterproof-sports-action-camera-19.jpg?w=1200&h=
LikeLike
You said, “The manual is an 11 page colour illustrated manual entirely in English…” I beg to differ. I don’t know what language it is, but it isn’t English when the instructions tell you that “When recording, the bottom. Sign is flashing then press the Enter key to stop recording while mark disappears.” Campark could have paid me $100 or so, and I could have written that so someone who speaks English can actually understand it without getting a headache!
LikeLike
This is sadly something all to common with products from Chinese suppliers, the language is English but it isn’t exactly clear or concise at times. To be fair I’ve reviewed 8 odd GoPro clones over the years and without reading the instructions first anyone familiar with a digital camera should be able to fathom all the camera functions and features within 5 to 10 minutes and my review covers the controls in fair depth.
Regarding your offer to write manuals in English you are sadly over expectant with the rewards. I have written a few manuals in my time and even on occasion provided stock photos and the most such suppliers would offer for a translation would be a free sample or £25, most of the suppliers I review for are sole traders or very small companies reselling OEM/ODM products operating with small margins.
LikeLike
The driving mode automatically turns on and starts recording when external power is applied or turned on with the power button. Also switches off when power is removed. For dash cam use plugged into the vehicle .
LikeLike
Greetings Patrick, I appreciate your comment very much, I had actually discovered this with a different camera that I reviewed after the Campark, in the past I was reviewing such cameras on foot and bike and so the use of this setting at the time was not immediately apparent. I have updated the review and given credit where due, thanks again for the heads up.
LikeLike
great blog post! Much appreciated
LikeLike
Per your description of the additional rear cover for the protective case, please take another look as the extra cover on my camera has open slots to allow for sound recording while the camera is in the case. It does not look as if it could provide any water protection for the camera. If they are all like that, there should be a warning to that effect.
LikeLike
Having double checked the spare backdoor provided for the waterproof case I am unable to find any holes in it, and testing the case with some tissue and the spare door, my sample seems to be entirely waterproof… Curious.
LikeLike
Thanks for the review. It helped a lot.
LikeLike
Thanks JP, glad it helped. If you bought one, please come back and let us know how you got on and what you think of it.
Regards
Eunoia
LikeLike
Hi has anyone had issues getting their camera to turn on??
LikeLike
Hi, can’t say I have no. Have you tried turning it on while it is on charge to rule out a dead battery, also when it is on charge are the charging indicator lights lit on the camera ?
Regards
Eunoia
LikeLike
hi, good review. I’ve purchased mine just for diving but cant see any filters that might fit, possibly go pro hero3 – any ideas?
LikeLike
Hi Jammy,
Sadly I have never owned a genuine GoPro, all I can say is of the 6 odd action cameras that I have reviewed all of the cases are slightly different, most cameras fit in other camera’s cases as it is the button placement that usually differs. What might be advisable is to get a camera with a Diving mode (sometimes called Aqua mode) like the SJ9000 or SJ9000 clones, enabling this mode will enhance reds and reduce blues to provide a more natural image when filming underwater.
Hope this helps, regards Eunoia
LikeLike
I have a Leshp 4k ultra HD sport camera. In video more the counter resets to 0’s and gives another file number. How can I make it continue on the original file as long as I do not turn it off.
LikeLike
Hi Mike,
This is something I have noticed with every action camera that I have reviewed, rather than recording one long continuous file, they record in segments of usually 5 to 15 minute long clips with sequential file names, I have never come across a setting that allows this to be changed and as far as I am aware it can not, sorry.
Regards
Eunoia
LikeLike
Great review – I am having trouble streaming to my tv via the micro hdmi. I would expect it to auto detect when connected and in playback mode but it doesn’t. Any ideas?
LikeLike
Greetings Chris, I have to confess this has got me perplexed, every other action camera that I have reviewed has had a TV Out mode in the settings that is enabled to switch display output to the Micro HDMI, the Campark most defiantly does not have this option in the settings and the assumption that it would automatically switch when in playback mode is a logical assumption.
I sadly do not have access to the Campark at this present time, I have read through all the reviews and questions posted on Amazon and I found one comment that might help, someone implied that when the Micro HDMI cable is connected you have to hold the down button to enable WiFi to transfer the signal, this sounds odd but it is sadly he only reference I can find. If this solution does not work please let me know and I can get my hands on the camera on Saturday to have a test and play myself to find a solution.
Regards
Eunoia
LikeLike
Hi Eunoia, thanks for getting back to me – sadly that didn’t do the trick. If you do get the chance to have a go with one I would be grateful !
LikeLike
Will do Chris, I gave the Campark to my neighbours son so I’ll pop round to see him on Saturday to see if we can’t find a solution for you.
Regards
Eunoia
LikeLike
Hi Eunoia, and thank you very much for this very good erticle. I have just received the camera (discounted at 50€ from Amazon) and fixed on the motorbike. Very good quality for this price.
I have a problem : unable tu connect the camera on a Mac to download the files.
No problem with a Windows PC or from the iPhone. But no way to use it with a Mac ?
I tried a lot of formating options but not accepted by the Camera. It asks me to initialize it and after no way to use in on a mac.
That’s my only problem with this camera, but this is a big problem. Only solution i found : using my virtual machine with Windows on the Mac (VMware Fusion).
And in your WIFI paragraph : Yes i can connect the Mac to the wifi of the camera. But how to access the files ?
If some one has a solution…
Thank you
Marc
LikeLike
Greetings Marc,
First off let me say that sadly I do not have access to a Mac so I am sadly unable to comment with first hand experience regarding direct connectivity to the Campark camera. Reading some reviews for the camera on Amazon it appears that the camera formats the MicroSD card in a format not compatible with Macs…
https://www.amazon.co.uk/gp/customer-reviews/R3T86LK5JFXNJM/ref=cm_cr_arp_d_rvw_ttl?ie=UTF8&ASIN=B01J51W5QG
https://www.amazon.co.uk/gp/customer-reviews/R3DV4OV70C5SKP/ref=cm_cr_arp_d_rvw_ttl?ie=UTF8&ASIN=B01J51W5QG
Regarding Wi-Fi, when you enable Wi-Fi on the camera and connect to it on a PC the MicroSD card in the camera shows up as a drive on “My Computer”, this is different for phones/tablets as the camera uses an App as detailed in my review, as for the Mac, if there is a format support issue I can only assume it might not show up.
I suspect (unless someone else with first hand experience with a Mac and this camera would care to chip in) the best option would be to transfer images/video from the camera to your phone/tablet and then transfer to your Mac via Bluetooth ?…
Let me know how you get on and if there is anyway I can help
Regards
Eunoia
LikeLike
Hello Eunoia,
Big thank for your very fast answer !
This morning i tried to access the SD card from another machine. No problem from my very old iMac (2006 – Mac OS 10.7) ; it works without any problem ! The drive mount automatically like an usb key.
But no way on my new MacBooPro DB with Mac OS 10.12.
I’ll keep informed if a find a “patch”.
Joe
LikeLike
Greetings Joe,
Sorry I’m not very fast with the replies I’m having some major renovations done and have problem with the people doing the work, which leads on to my next statement… The camera is sadly packed away along with all my other action cameras in the loft at the moment so experimentation at this time is not possible, that said I do not know if this helps but as the camera records long videos in 15 min segments I’m guessing it formats the card as Fat32, that said if it were the Mac should still be able to read it.
I’m curious, if you have a card reader on your Mac have you tried formatting the card directly from your Mac and then using it on the camera and seeing if the Mac recognises it ?, its a long shot as the camera might reformat the card or just not recognise it but something to try…
Regards
Eunoia
LikeLike
Hi Eunoia,
yes i tried to format the card from the Mac with all possible options but when i re-insert the card into the camera, it asks me to initialize. I tried to format on windows computer too : some formats (exFat 1042octets) are accepted by the camera but not by the new Macs.
I resent the camera to Amazon.
Thank you for your help
Joe
LikeLike
Sorry I wasn’t able to help Joe, this might be worth a try, it’s only 1080p however…. https://macsources.com/apeman-sports-action-camera-review/
LikeLike
Hi Eunonia,
Outstanding review! Thank you for taking the time to make this.
My question:
I’m trying to use VLC player to watch streaming video from the camera using the wifi connection on my Windows laptop.
To do that, I need to Open the Network Stream know the “streaming URL”.
With my SJ4000, I simply connect my laptop to the camera using wifi, open VLC player, then go to File, Open Network Stream, and use “rtsp://192.168.1.254/sjcam.mov” and… Voilà!
I can view the camera full screen.
I can’t find the streaming URL to use with the Campark UHD camera (mine is the Xtreme II).
Would you have this info for the Campark UHD cameras?
Thanks for your help.
Etienne
LikeLike
Greetings Etienne,
Sadly I’m unable to come up with a definative solution for you at this time, I am currently without my laptop and my desktop does not have WiFi so I am unable to test/experience first hand.
The following should help however…
– Connect the camera to you Laptop/PC over WiFi.
– Open Command Prompt
– Type ipconfig
– Press return and lots of information is presented on screen
– Scroll to the top of the page
– Look for the “Default Gateway” IP address
This IP address is that of the camera (as you are connected directly to the camera and not a router/modem) and you should be able to live stream through VLC using it.
Hope this helps, if not, please let me know and when I get my laptop back on Mon/Tues I’ll do some testing to find a solution. Another possible option is to ask Campark (http://www.campark.cn/a/contactus/) I’ve had a few converstions with them over the past couple of years regarding this review and they speak (write) very good English.
Regards
Eunoia
LikeLike
Thanks for the quick reply.
I’ve sent an e-mail to Campark and will share their answer when I get it.
Using ipconfig, I see the default gateway for wifi is:
192.168.100.1
So typically, the network stream should look something like:
rtsp://192.168.100.1/stream-name.mov
The stream name varies depending on the camera….
LikeLike
Hi Etienne,
My apologies, I did not realise that the stream name varied, I have not live streamed myself and I assumed that it was like mapping a network drive (that you only needed the IP address). As the name varies by device, I sadly defiantly can not help further and I hope that Campark get back to you soon.
If they do not reply in the next few days try my contact at Campark, a person called Kin in the marketing department, their email address is camparkpromotion@gmail.com, please note that I have not spoken to them in about 14 months so I can not guarantee the email is still valid or that Kin is still there, it’s just another avenue to try if you do not get a reply from the main contact page.
Regards
Eunoia
LikeLike
Hi Eunoia,
Actually, I’m not an expert with action cameras… My only experience comes from my SJ4000.
I sent an email to Campark a few days ago and I’m waiting for a reply.
The reason why I would like to find the stream URL is to be able to watch the stream in full screen mode, then hook it up on a projector and project on the wall the camera stream.
XDV works really well on my android phone, but the app doesn’t allow for full-screen viewing.
VLC is a convenient way to view a stream in full screen mode…
LikeLike
I’ll confess it’s not something I have tried and I do not have a cable to test myself but have you considered connecting the camera to the projector with a Micro HDMI cable ?
LikeLike
The Campark camera would be moved around on stage in a show and I would like the camera’s point of view to be broadcasted on a big screen… so wireless whould be the only practical way to do it…
LikeLike
Right, I’ve been doing a little digging this morning.
Firstly, this video might help…. https://www.youtube.com/watch?v=rOVR6ks10OA
If not there’s some useful information on this forum… https://dashcamtalk.com/forum/threads/hacking-q3h-allwinner-v3-camdroid.20507/page-8 (you might want to start reading earlier that the link starts).
I’m not sure if you noticed in my review I stated the camera is actually a Q3H or Q3H-1 made by HDking and rebadged by Campark so when trying to find answers to problems, it’s worth googling HDKing Q3H rather than Campark action camera.
You can also try contacting HDKing at http://www.hdking8.com/contact-us_d2
Note that if you do, do not expect an English reply, it might be worth using google translate and emailing them in traditional Chinese, also do not mention Campark, just say you are contacting them about your HDKing Q3H camera.
I hope one of these provide the answer you need.
Regards
Eunoia.
LikeLike